Editing Invoices
It is not generally recommended to edit invoices. Usually, it's best to edit the timesheet entries and then recalculate the invoice. If desired, however, you can add, edit, or delete line items on an invoice. The instructions in this article will show you how to make changes to an invoice.
1. Open the invoice you would like to edit
On the Search Invoices page, click on the line item of the invoice you would like to edit.
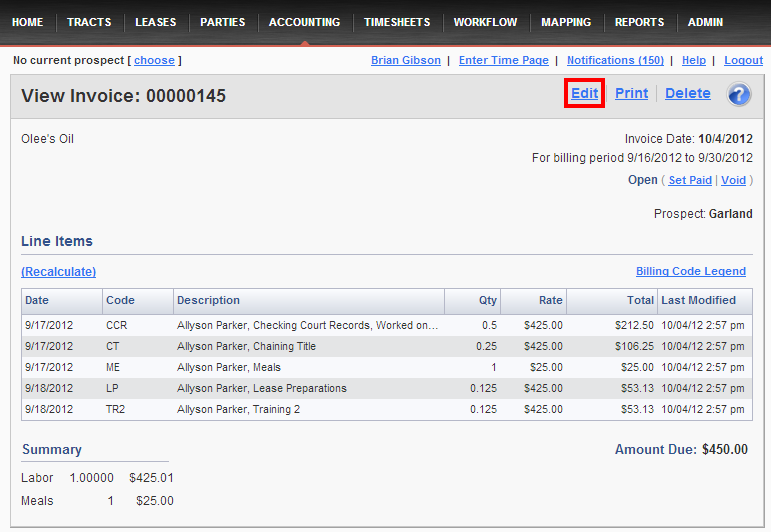
2. Click on Edit
In the upper right corner of the page, click on the blue Edit link.
3. Make desired changes
Making general changes to the invoice (e.g. Date, Terms, Numbers)
The top half of the screen is reserved for changes to the invoice in general, e.g. the Date, Terms, and Billing Period that will appear on the invoice. After changing any of the fields, click the green Save button.
Adding, editing, or deleting line items
To add a line item, click on the Add Item button. In the Create Invoice Line Item window, enter the Date, Billing Code, Quantity, and Rate. If desired, also enter a description. Click Save when finished.
To edit an existing line item, click on the Edit link to the left of the line item. On the Edit Invoice Line Item window, make any desired changes. When finished, click the green Save button.
To delete a line item, click on the trashcan icon to the right of the line. On the Confirm Delete box, click Yes if you would like to delete the line item.
By default, invoices are sorted by date of line item. If you want to sort the invoice by date (or any other column heading), click on the column heading. Click once to sort in descending order, or click again to resort in ascending order.

Comments
Be the first to post a comment